
How to you set up your Micro Speed Scooter? I’ve taken loads of photos for you in this Micro Speed Scooter unboxing guide, to walk you through assembly so you can get riding.
Luckily it’s under a 5 min job, if that! It’s seriously easily and only a few minor steps to follow. Put that screwdriver away, you don’t need it!


Hi I’m Jamie. I’m one of the scooter specialists for ScootersForAdults.co.uk.
I’ve owned my Micro Speed for 4 years now – love it. It’s actually not the speed aspect, it’s how lightweight it is and how easy it is to fold. I also wrote a more detailed Micro Speed scooter review if you want to check that out.
Micro Speed Scooter Unboxing 📦
1️⃣ What’s Inside the Box?
When you open your Micro Speed Scooter package, you’ll find inside…
- Folded Micro Speed scooter – only the handlebar grips need putting in place and the handlebar itself adjusted to the right height.
- Instruction manual & safety guide – have a read of this. The first sections are not in English, so navigate to your language and then it’s just 3 pages or so. Most of it relates to all Micro scooters, so scan to find the bit relevant for Micro Speed.
- Allen key – for any post-unboxing adjustments, though I didn’t need to use it on my set up.

How do you register your Micro Scooter warranty?
- Warranty & support card – I just went straight to the Micro warranty page to register.
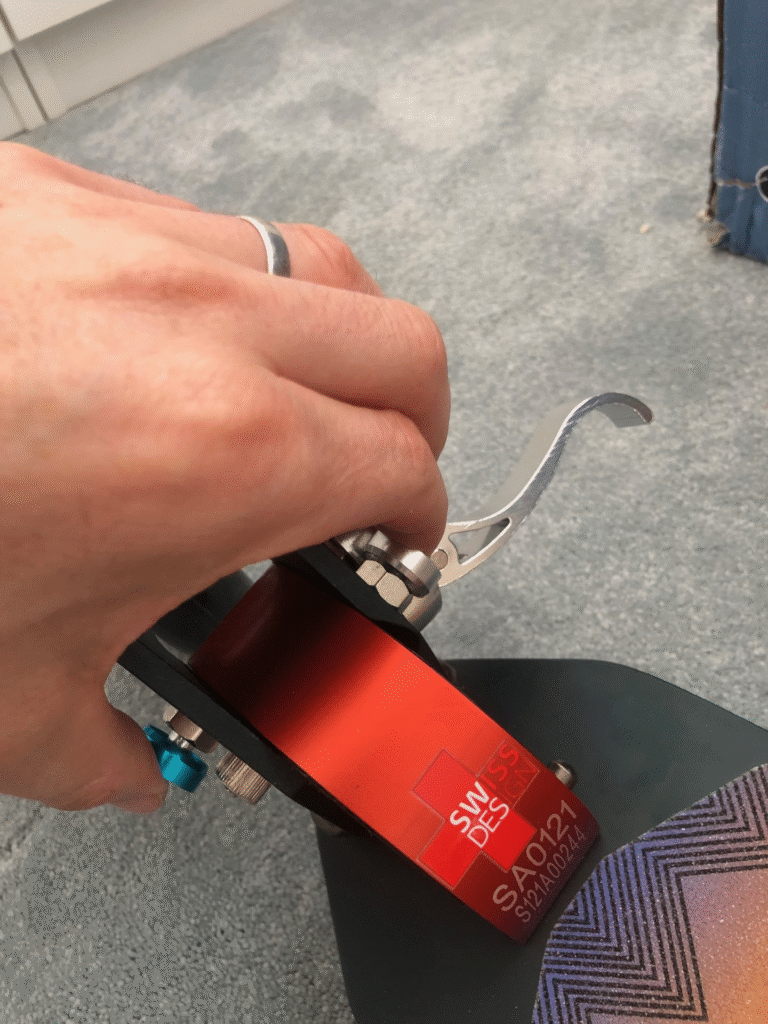
- Scooter Serial Number – to find your Micro scooter serial number look for the section that connects the handlebar to the deck. On mine it’s red and has 2 sets of numbers. You want the bottom number.

2️⃣ Unboxing Steps
- Open the box carefully – avoid cutting too close to the packaging cos you don’t want to scrape your scooter. It doesn’t come with loads of polystyrene covering it, which I really like to avoid ruining the planet. So don’t shove a sharp knife into the box.
- Remove the scooter and accessories – take the scooter out, even if it feels a bit wobbly.
- Check all parts are included – you should have all the parts I had below.
- Inspect for damage – checks there’s no visible wear or defects, otherwise back it goes to Micro.

3️⃣ Assembly Guide
No complicated tools needed! Just follow these easy steps and you’ll be up and running…
🏁 Setup time: easily under 5 minutes…
- Step A: Unfold the scooter by pulling the big silver latch (to the right of my finger – you can see it’s open) and press this button with one hand, and the other hand can pull open the scooter. Then push the latch back again to tighten it. Super easy.

- Step B: Adjust the height by opening the latch at the top and pulling the handlebars upwards. If you go right to the top this little button pops out into the hole. This means you’ve reach max height.


- Step C: Secure the handlebars themselves into place by slotting them in – because the first time you get the scooter they are loose to fit into the box. Slide them in under the little button pops through the hole. And do both sides.
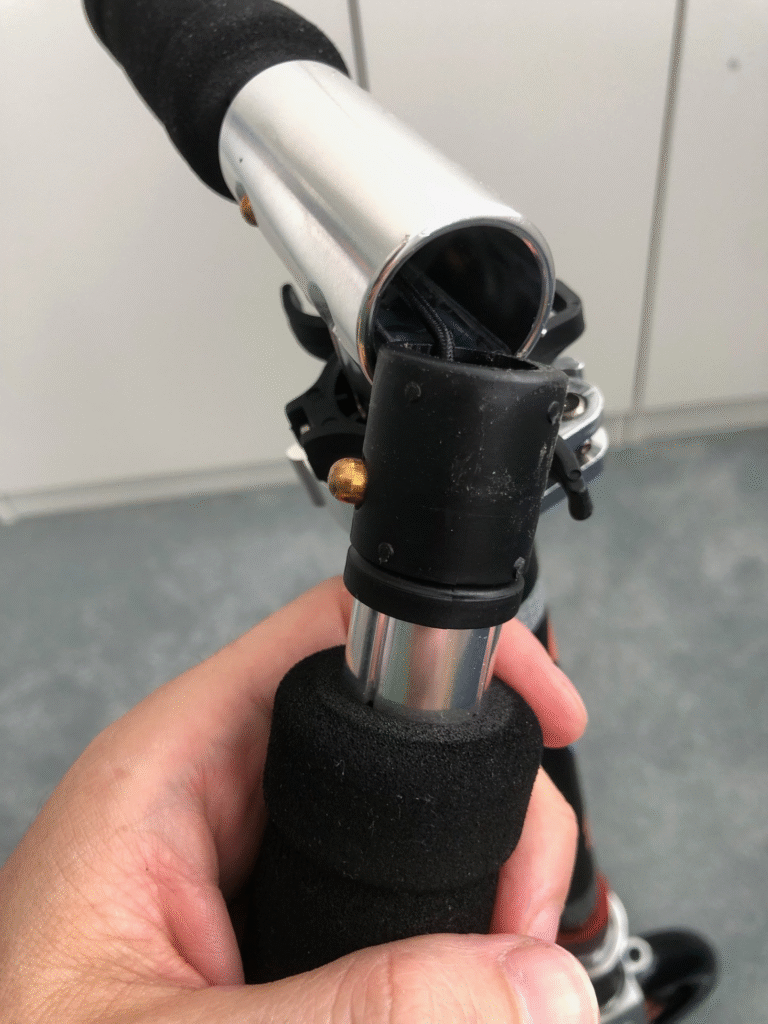

- Step D: Check the kickstand works – it just folds out. And tighten any loose bolts with an Allen key. You probably won’t need to tight any to be honest, I didn’t need to, but they provide Allen keys just in case you do.

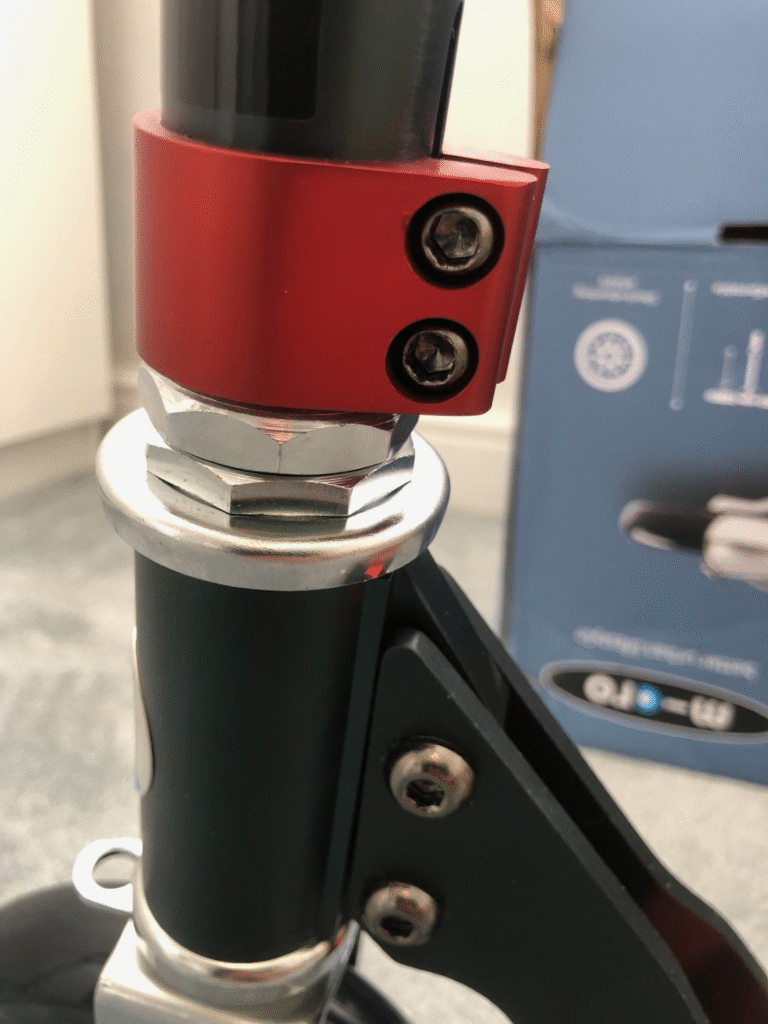
- Step E: Perform a quick pre-ride check – test the brakes, spin the wheels, and take it round the block
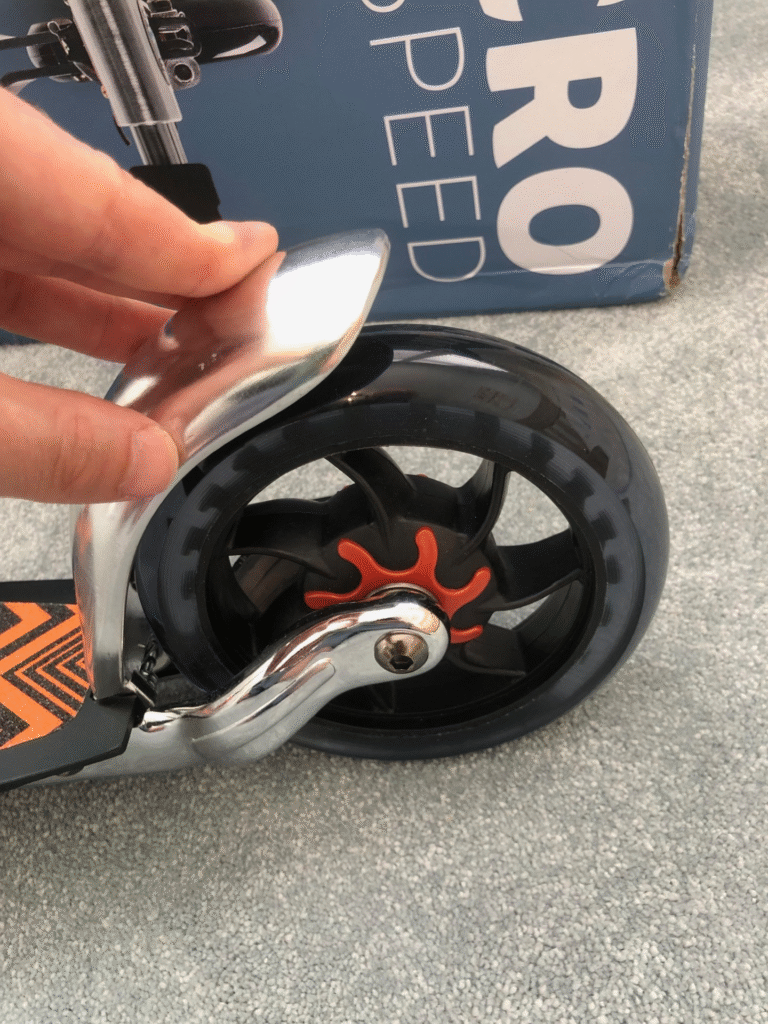

- Step F: Unfold your scooter & lower handlebars after use – open the latch, and press both of these buttons at the same time and pull the handlebar down. It’s the blue and silver buttons on mine. If like me you’re limited for storage, I also lower the handlebars back down by pressing the button back in and lowering it (with the latch open), just like I did when I raised it. Now it’s as compact as when you unboxed it.
Micro Scooters have also put together this useful video. I watched it when I put my scooter together and it was very helpful, breaking it down really easily…
4️⃣ Impressions Once Unboxed
Honestly after pulling it out of the box I was impressed. I could tell it was light having also owned a Micro Classic and Oxelo Commute 900, both weigh more and have larger wheels (200mm vs 145mm on the Micro Speed).
That’s not to say these are better or worse, it’s more than this scooter is built solidly yet it’s light, and you can tell that right out of the box.
First impressions for me were…
- Build Quality: Feels solid and well-engineered right from the get-go.
- Portability: Light (~6 kg) and folds compactly – it’s just how I hoped it would feel. I’ve got to hold it on the train and up and down stairs, and I can tell I can do that easily.
- Ride Comfort: Wheels glide smoothly and brakes respond well. The brakes feel strong yet easy to push down.
- Folding Mechanism: Snaps into place with a reassuring click. It’s why we rated it highly as one of the best folding scooters too. It kinda clicks a bit in a concerning way the first time you do it, so if that happens on your one it’s normal – cos it’s just the mechanism working it’s way in.
For my full breakdown of the scooter check out my Micro Speed Scooter review where I go into detail on what I think having owned one for some time.
5️⃣ Useful Tips & Tricks
A couple things I recommend once you start using the Micro Speed…
- Tighten after first ride: Some parts settle in after use
- Use proof‑point grease: Keeps the folding latch smooth
- Pack responsibly: Keep the manual and Allen key stored with the scooter
- Avoid moisture: Wipe down after wet rides to prevent rust
🏁 Summary: Micro Speed Scooter Unboxing & Assembly

The Micro Speed Scooter is an outstanding choice for those who want simplicity, portability, and premium feel. The unboxing process is so easy as you can see above, assembly is intuitive, and the end result is a well-crafted ride ready to go in minutes.
You can check out the Micro Speed here if you need more info or our review below…
For my full breakdown of the scooter check out my Micro Speed Scooter review where I go into detail on what I think having owned one for some time.
🔗 Other Useful Guides You Might Like
❓ FAQs – Micro Speed Scooter Unboxing
No, just the included Allen key for minor tightening. The rest can be put together by hand.
Typically under 5 minutes from box to first ride.
Only basic. Just ensure the bolts are snug and brakes are aligned.
Contact Micro support directly with your order number.
👍 I hope you found this guide useful – and thanks for reading!
📩 If you’ve got questions – feel free to email me on: scootersforadults@gmail.com